Marketplace Platform v2.3 deprecation:We’re continuing to improve the Marketplace Platform to deliver stronger security, better performance, and new capabilities. As part of this evolution, Marketplace Platform v2.3 will be deprecated. To learn the dates and next steps, see Migration guide.
Important:- Before submitting an app in the Developer portal, to facilitate quick review and publishing, ensure that the app meets the content and code review guidelines.
- The app submission process is now enhanced by Freddy AI, allowing developers to easily update essential app details.
The Freshworks’ app submission process enables you to,
For a Freshworks app, after a new version is reviewed and published, it is available for app users, if they want to update their existing app.
The developer platform’s What’s New feature,
Enables you to provide a What’s New/Release Notes write-up, when submitting a new version of an app. For information on how to include Release Notes when uploading a new version of the app, see Upload and submit a new version of an existing Freshworks app.
Helps app users understand the enhancements in the new version. When app users view the list of installed apps, if a new version of the app is available, a What’s New link is displayed along with the Update button. App users can click this link to read the release notes and then take a call on whether to update the app. The What’s New and the Update button are also available when app users navigate to the apps gallery (Admin > Automation & Productivity > Extensibility > Apps), select an app card, and view the app details.
After your app is deployed, you can measure your apps usability and engage with your app users, through the App insights provision. For more information, see View app insights.
Upload and submit a new Freshworks app
Log in to your Freshservice account.
Navigate to the apps gallery (Admin > Automation & Productivity > Extensibility > Apps). In the Build your own apps section, click Build it yourself. The All Apps page of the Developer portal is displayed.
Or
Navigate to the Neo Admin Center page. In the My Accounts section, click on the developer account (/developer). The All Apps page of the Developer portal is displayed.
Notes:- If multiple accounts are associated with the organization, the Choose an Account window is displayed. Select the account to view the All Apps page for the selected account.
- In the All Apps page, you can switch between the accounts of the organization from the dropdown displayed.
- In the Neo Admin Center page, the developer account (/developer) will be displayed under the My Accounts section only if the developer has navigated to the Developer portal at least once.
 The All Apps page
Click New App and select Freshworks App. The Create a new app page is displayed.
From Select your App type, select Freshworks App.
In the Upload Zip file section, click Upload App file, select the packed app file, and click Open. Note:To replace the uploaded app file, click Replace App file, select the packed app file, and click Open. The packed app file is replaced.
To submit the app as a paid app, in the App Pricing section, select Paid.
Notes:A paid app enables you to generate revenue whenever a customer installs your app from the Freshworks Marketplace. For more information, refer to Terms of Use.
After you submit an app as a paid app, you cannot modify the app to be a free app. To make the app available as a free app, resubmit the app as a Freshworks App with a different app name.
In the Name your App field, enter a meaningful name comprising two or three words.
Click Save and Continue.
In the details panel on the left, the following values are auto-populated:
- The app’s name with the app status as Draft.
- The status of the app’s details such as Code Upload, App Information, Media and Installation, Support Details, Privacy and Security, and App settings (displayed only when the uploaded app file has app settings functionality).
- App type: Specifies how an app is available to an app user. Possible App types: Freshworks app (publicly displayed in the Marketplace), Custom app (private only to the customer using the product), External app (listed in an external website).
- App Id: An app’s identifier that is displayed after the app is published.
- Last updated: The timestamp of when the app was last modified.
- Built for: The products for which the app is built.
- Code File: The status and versions of the uploaded app, displayed in chronological order. When a new Freshworks app file is uploaded, the status is Draft Version (Draft).
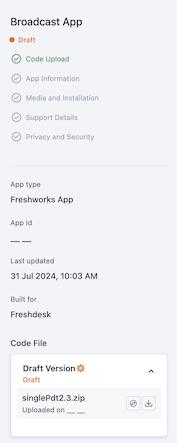 Draft version of the app
To replace the uploaded app, in the Code File section, click the replace icon.
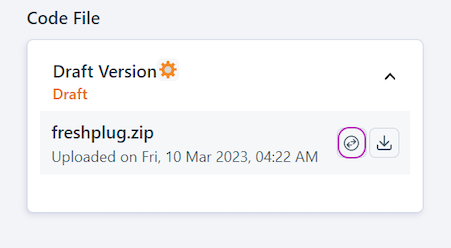 Replace draft version of the app
The Add New Version window is displayed. Click Replace to upload a new packed app file.
To submit the app as a paid app, fill out the requisite pricing details in the Pricing Details section.
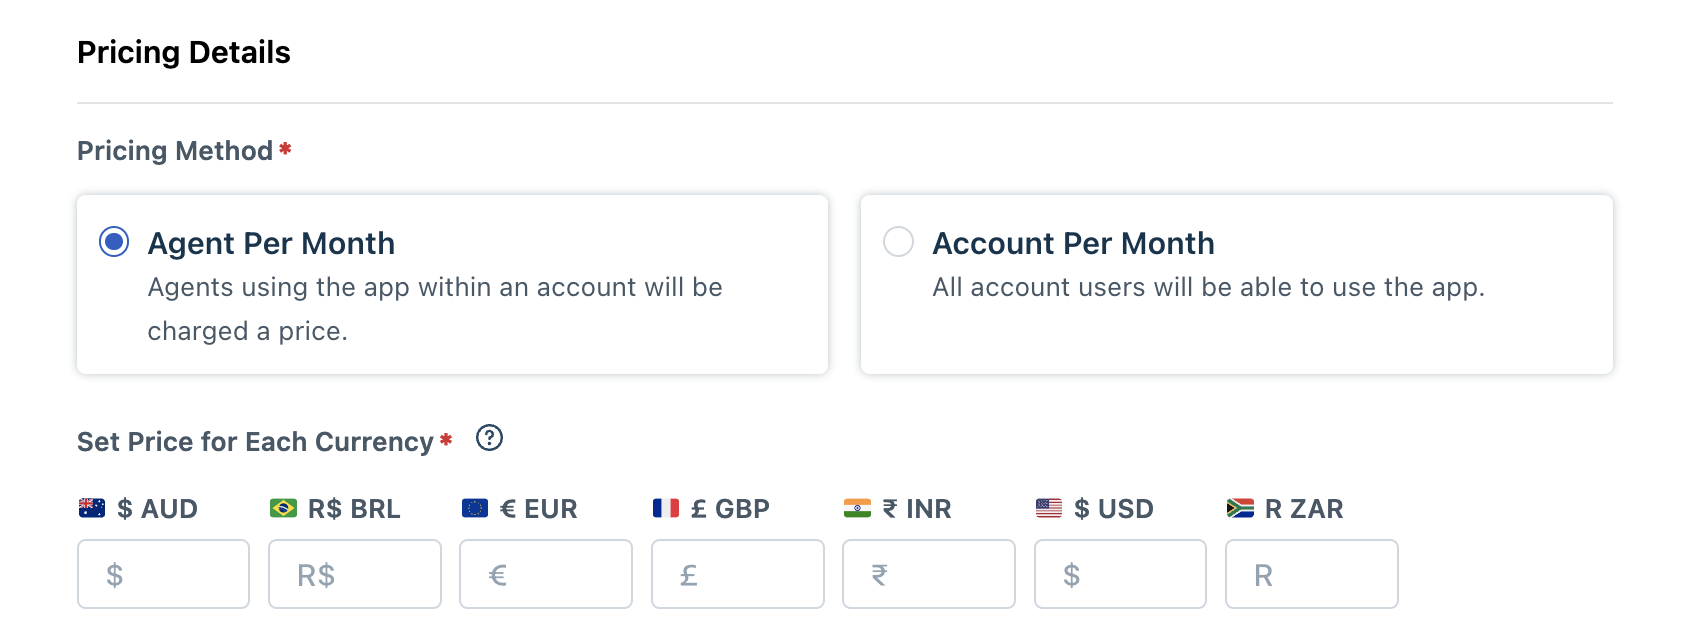 Set price for paid app
Field Description Pricing Method Mandatory Select a pricing plan based on which Freshservice customers are charged to use the app: - Agent Per Month: Customers are charged the price specified in the Set Price field, for every agent using the app.
- Account Per Month: Each unique customer account is charged a fixed price specified in the Set Price field, irrespective of the number of agents using the app.
Set Price for Each Currency
MandatoryEnter a price for app usage. Note: Ensure to enter values in all supported currencies such as AUD, BRL, EUR, GBP, INR, USD, and ZAR. In the main section of the app details page, navigate to the App information tab and update the requisite app display details. Click Save and Continue. The Media and Installation tab is displayed.
Important:- The app submission process is now enhanced by Freddy AI, allowing developers to easily update essential app details. You can describe your app’s problem statements, functionalities, features, and specifications, then click Generate to autofill the Name, Overview, Short Description, Categories, and Subcategories. Multiple suggestions will be provided, giving developers the option to choose from various options.
- Click Regenerate for new suggestions. Additionally, developers can like or dislike each suggestion to refine the results further.
In the Media and Installation tab, update the requisite media, installation, and support details. Click Save and Continue. The Privacy and Security tab is displayed.
In the Privacy and Security tab, answer all the questions regarding the app’s end-user data practices.
If your app uses the app settings functionality, click Proceed. The App settings tab is displayed. In the App settings tab, update the requisite app settings details.
Click Save to save all the app, media, support, security, and app settings details.
To specify the app information in a language other than English (default language), navigate to the Multi-language setup tab and click Add language. A list of languages is displayed. Select the languages in which you want to specify app information and click Add. Sections corresponding to the languages are added. Navigate to each language section and in the fields displayed, enter the appropriate values.
Click Save and Publish, to submit the app for the approval process.
In the details panel, the Last updated timestamp is updated. A View activities link is displayed. To view all app submission activities that have been performed, click View activities. The Activities page is displayed. In the Code File section the app status is updated as Draft Version (Under Review).
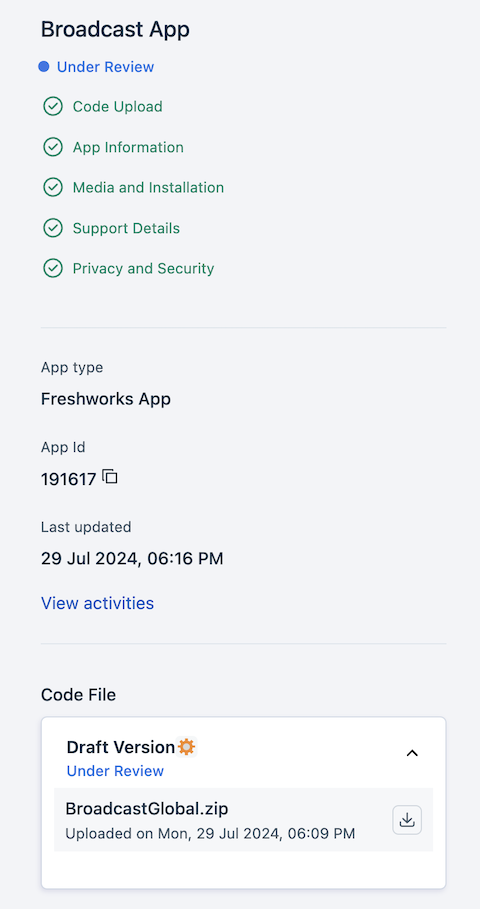 Code file section
After the app is reviewed and approved, it is published to the Freshworks Marketplace.
After app approval
If the app is approved and published to Marketplace, in the App details page > Code File section, the status of the app is modified to Live Version (Published).
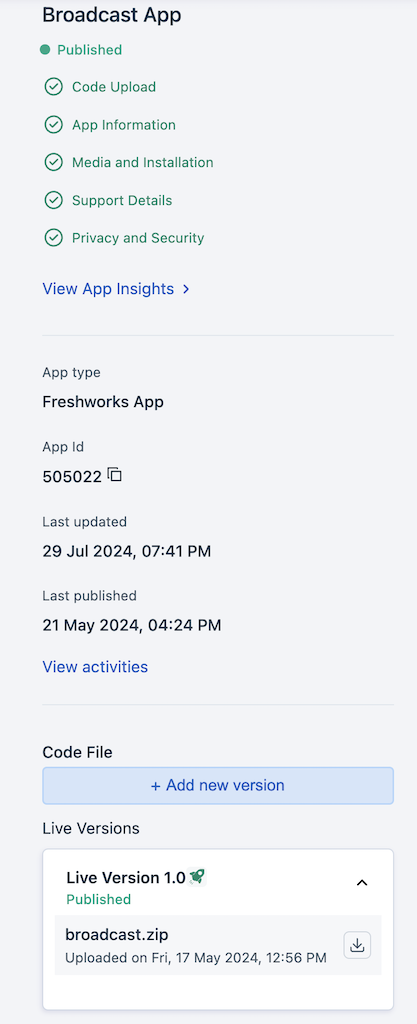 Published app in Code file section
Provide selective access
After the app is published, in the main section of the app details page, an App Sharing Settings section is displayed. You can provide limited accessibility to your app by hiding the app from the Marketplace and selectively sharing an account-specific URL. App users on that account can access the app through the shared URL. To do this,
In the App Sharing Settings section, set the Hide from gallery toggle key to on state. Note: When submitting an app, in the app details page > App information tab, if you had enabled Hide from gallery, this key is set to on by default.
In the Shareable URL input box, enter the full domain name (<sub-domain>.domain.com) of the customer account for which you want to make your app accessible.
Example domain name: freshfoods.myfreshworks.com
Click Generate URL. The shareable link to access your app is displayed below the Shareable URL input box.
 Sharable URL for selective access
View app insights
App insights provide metrics or data that help you to assess your deployed apps. After the app is published, in the App details page > details panel, a View App Insights link is displayed. Click the link. In the main section, the following tabs are displayed.
- Ratings and Reviews
- Uninstall Feedback
Ratings and Reviews
To view the ratings and reviews that app users have provided for your app, navigate to the Ratings and Reviews tab. The cumulative (average) rating of your app is displayed along with the count of the number of users who have rated your app and the number of app installations. The elaborate reviews that the app users have provided is also displayed.
In the following image,  is the count of the number of users who have rated the app and
  is the number of app installations, currently.
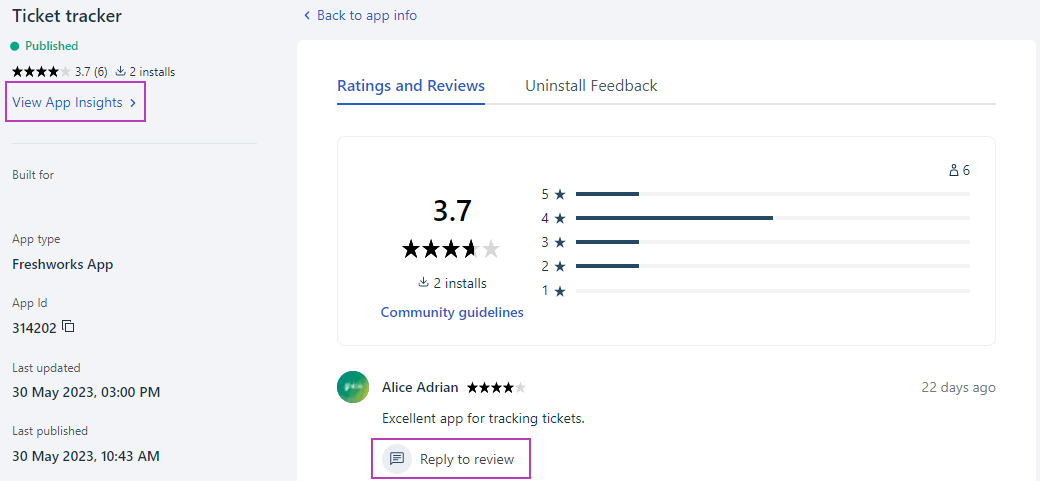 App insights for published apps
To reply to a review:
- Click Reply to review. A text box is displayed.
- Enter your response and click Post. The response is displayed along with the provision to edit or delete your response.
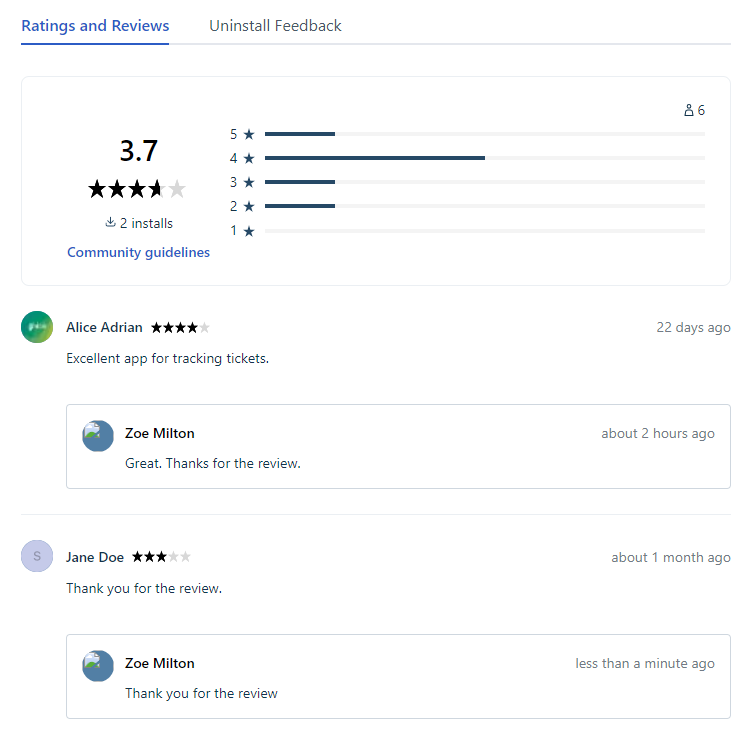 Ratings and reviews for a published app
When engaging with users through your response, ensure to phrase the response such that it aligns to our community guidelines. To access the guidelines, under the Ratings and Reviews tab, click Community guidelines. The Community guidelines window is displayed.
Uninstall Feedback
Click the Uninstall Feedback tab to view any feedback provided when an app user uninstalls your app.
 Uninstall feedbacks
After app rejection
If the app is rejected, in the App details page > Code File section, the status of the app is modified to Draft Version (Rejected) and the uploaded app file is available for deleting or editing.
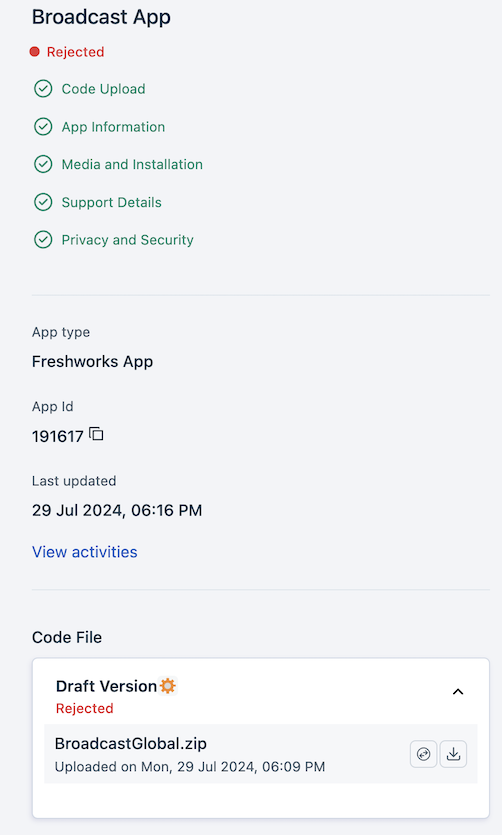 Rejected app in Code file section
- To delete the uploaded app file, click Delete.
- To replace the uploaded app file, click Edit. The Add new version window is displayed. Click Replace to upload a new packed app file.
After uploading the new packed app file, in the Code File section, the status of the app is modified to Draft Version (Draft).
Upload and submit a new version of an existing Freshworks app
Navigate to the apps gallery (Admin > Automation & Productivity > Extensibility > Apps).
In the Build your own apps section, click Build it yourself. The All Apps page of the Developer portal is displayed.
Click on the Freshworks app card corresponding to the published app for which you want to upload a new version. A page with the app details is displayed. In the details panel on the left, under the Code File > Live Versions section, all published app versions (up to a maximum of two latest versions) are listed.
In the Code File section, click Add new version. The Add new version window is displayed.
Click Click to upload and select the packed app file and click Open. The packed app file is uploaded and the Auto update toggle key is displayed.
- To replace the uploaded app file, click Replace.
- To automatically update in-use apps to the latest app version, set the Auto update toggle key to on state.
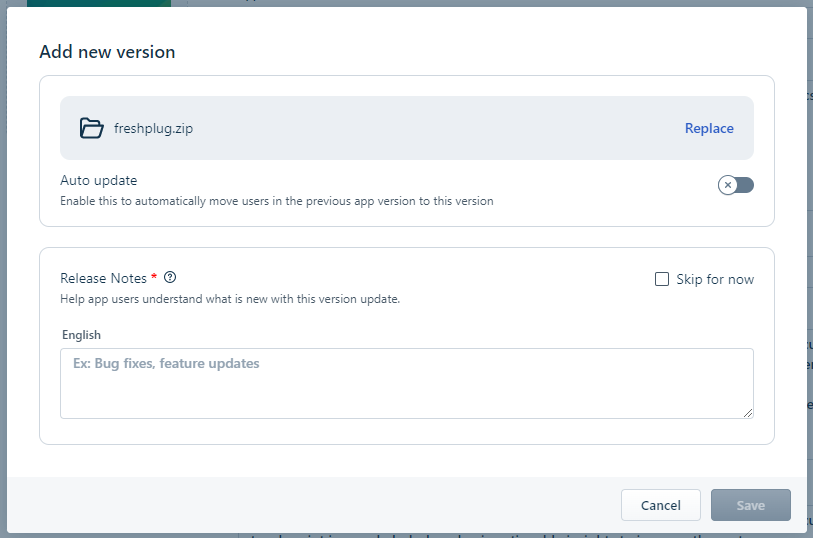 Add new version window
In the Release Notes section of the Add New Version window, if the app has multi-language support, sections corresponding to the languages are displayed. Otherwise, a section for English (default section) is displayed. Navigate to each language section and enter pertinent information regarding all feature enhancements, updates, and bug fixes associated with the uploaded new version and click Save. The app details page is displayed. In the Code File section, the new version of the app is listed. The app status is Draft Version (Draft). Note: To successfully submit the new version, it is mandatory to enter the release notes in all supported languages.
To add the release notes later, select the Skip for now checkbox.
Click Save. The app details page is displayed. In the Code File section, the new version of the app is listed with a warning symbol. The Edit button displays a red dot which is a prompt to add the release notes.
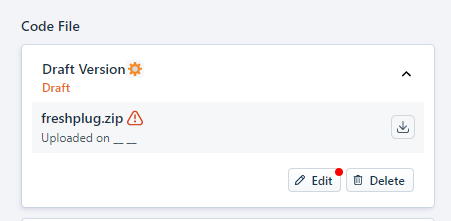 Edit button with a promt to add the release notes
In the main section of the app details page, navigate to the App information tab and update the requisite app display details. Click Save and Continue. The Media and Installation tab is displayed.
In the Media and Installation tab, update the requisite media, installation, and support details. Click Save and Continue. The Privacy and Security tab is displayed.
In the Privacy and Security tab, answer all the questions regarding the app’s end-user data practices.
If your app uses the app settings functionality, click Proceed. The App settings tab is displayed. In the App settings tab, update the requisite app settings details.
Click Save to save all the app, media, support, security, and app settings details.
To add a supported language in which the app information is displayed, navigate to the Multi-language setup tab and click Add language. A list of languages is displayed. Select the language you want to add and click Add. A section corresponding to the language is added. Navigate to the language section and in the fields displayed, enter the appropriate values. In the Code File section, the Edit button displays a red dot indicating that the release notes update is incomplete. To update the release notes in the newly added language, click Edit. The Add new version window is displayed. In the Release Notes section, navigate to the newly added language and update the corresponding content.
Click Save and Publish, to submit the app for the approval process. The app status is updated as Draft Version (Under Review) in the Code File section.
If necessary, provide selective, account-specific access to your app.
After the app is reviewed and approved, it is available for app users, if they want to update their existing app. In the Installed Apps page, next to the app, a What’s New link is displayed along with an Update button. App users can click this link to read the Release Notes and then take a call on whether to update the app. The What’s New and the Update button are also available when app users navigate to the apps gallery (Admin > Automation & Productivity > Extensibility > Apps), select an app card, and view the app details. Note: If you have enabled auto-update for your app version, the What’s New content and the Update button are not displayed to app users. All in-use apps are automatically updated to the app version for which auto-update is enabled.
App information tab
The app submission process is now enhanced by Freddy AI, allowing developers to easily update essential app details. You can describe your app’s functionalities, features, specifications, and problem statements in the App Display Details section, and then click Generate to autofill the Name, Overview, Short Description, Categories, and Subcategories. Multiple suggestions will be provided, giving developers the option to choose from various options.
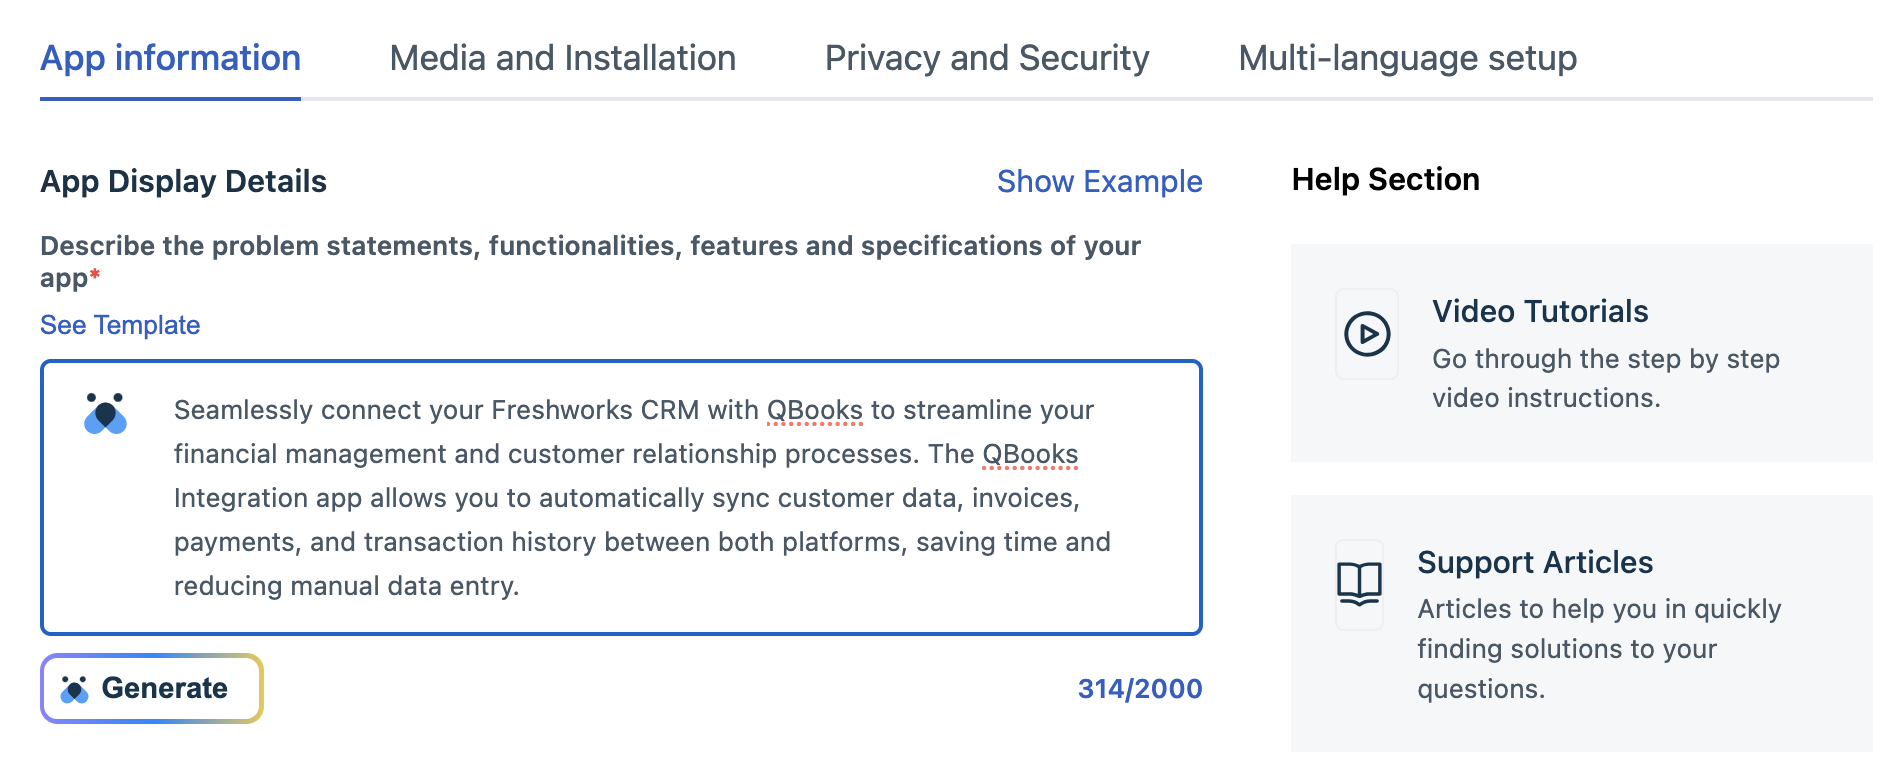 App information tab powered by Freddy AI
For new suggestions, click Regenerate. Additionally, developers can like or dislike each suggestion to refine the results further.
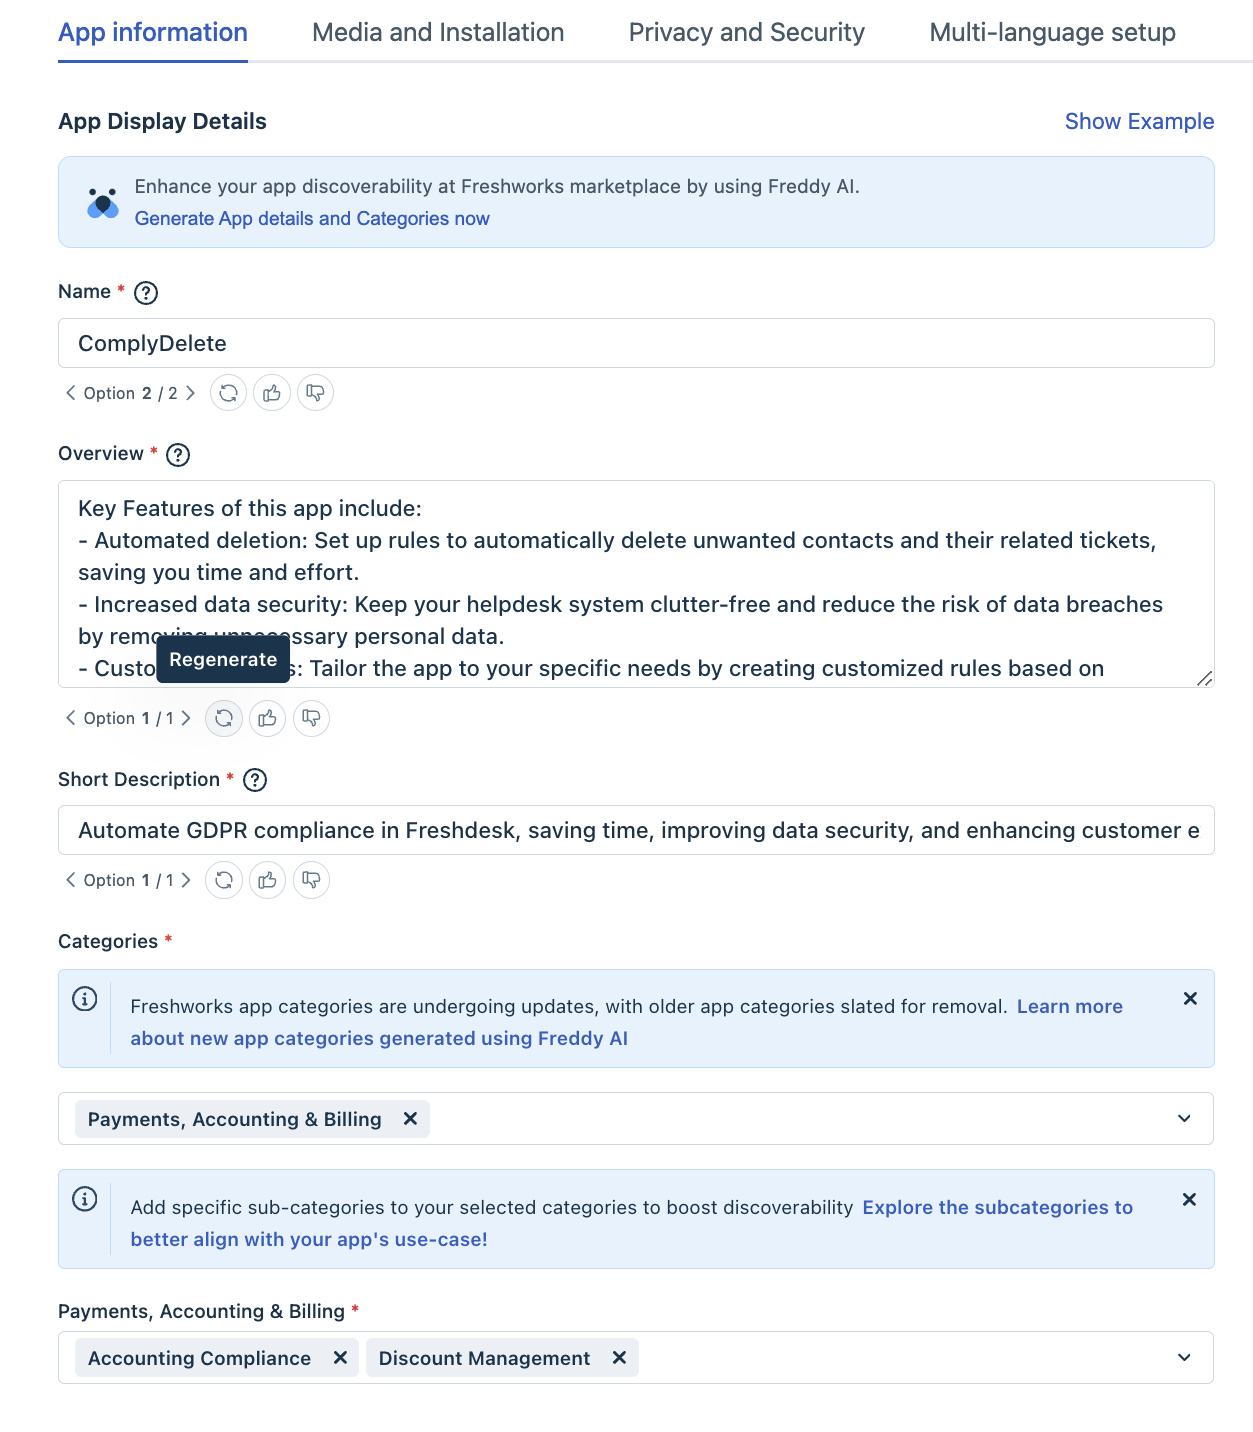 Freddy AI generated App information tab content
The app display details to be displayed in the Freshworks Marketplace are captured in the following fields:
| Field | Description |
|---|---|
| Name Mandatory | Enter a name for the app, comprising two to three words. |
| Overview Mandatory | Enter an overview of the app’s functionality and features, stating the value that the app imparts to the Freshworks product. Mention any specific use case necessary to support the value proposition. |
| Short Description | Enter a brief introduction to the app, not exceeding 100 characters. |
Categories Mandatory | Select the appropriate category to help users filter and find the app in the Marketplace gallery. You can select a maximum of three categories. For more information about the app categories, see App categories. Important: For AI-powered apps, ensure that the Category is selected as AI & Bots. |
Subcategories Mandatory | Select the appropriate subcategory to help users find the more relevant app in the Marketplace gallery. You can select a maximum of two subcategories. For more information about the app subcategories, see App Subcategories. |
- To view the sample rendering of app details in the Freshworks Marketplace, navigate to each section and click Show Example.
- For more information on the Freshworks app building and submission process, refer to the video tutorials, support articles, and FAQ’s in the Help section.
Media and Installation tab
The media and Installation details to be displayed in the Freshworks Marketplace are captured in the following sections:
Media
| Field | Description |
|---|---|
Icon Mandatory | Upload an icon to represent the app. Ensure that the logo meets the following requirements.
To replace the uploaded app icon with, click Replace App icon. |
Screenshots | Upload screenshots to the Common section to illustrate how the app works. Capture different states and process flows to give users a better insight into the app. You can upload a maximum of five screenshots. Ensure that the screenshots meet the following requirements.
|
Video link Mandatory | Enter the URL to the YouTube or Vimeo video that explains the app’s use case. The URL should be in the following format:
For more information on the guidelines, see Video link. |
| Installation Instruction | When the app is installed, if specific user actions are required, enter the instructions as a sequential list. |
Support Details
| Field | Description |
|---|---|
| Specification / Demo Video Mandatory | Enter the URL to the app’s specification document or demo video. |
| Support Email Mandatory | Enter the email address that users can use to contact you in case of any queries regarding the app. |
| Support URL Mandatory | Enter the URL to any location where users can find more information about the app. |
| Alternate Email Mandatory | Enter the email address that Freshworks can use to contact you, when the app is under review. |
| Privacy policy URL Mandatory | Enter the URL to the app’s privacy policy that clearly states the mechanism followed by the app when handling user information. |
| Terms of Service URL Mandatory | Enter the URL to the Terms of Service/Use that apply to the app user, when using the app. |
| Hide from gallery | Set the toggle key to on state, to hide the app from the Marketplace apps gallery. After the app is published successfully, in the app details page, an App Sharing Settings section is displayed. This section facilitates generating a shareable link for your app and enables you to provide selective access to your app. |
- To view the sample rendering of app details in the Freshworks Marketplace, navigate to each section and click Show Example.
- For more information on the Freshworks app building and submission process, refer to the video tutorials, support articles, and FAQ’s in the Help section.
Privacy and Security tab
The details of how the app is utilizing the end-user's information is captured as answers to the questionnaire.
During app submission, ensure that all questions regarding the app’s end-user data practices are updated with complete transparency. Also, ensure that
For AI-powered apps, ensure that the Category is selected as AI and select Yes for AI/GenAI question. Also, it is mandatory to indicate whether they comply with Freshwork's AI-powered features and Freddy AI terms. Once the app is published on the Freshworks marketplace, this will ensure that the app displays a Verified by Freshworks badge.
Note: AI powered apps that are non-compliant with Freshwork's AI-powered features and Freddy AI terms will display a Not governed by Freshworks Freddy AI badge.
If your app collects, processes, or stores end-user information, provide details on the information collected, processed, or stored, its purpose, and the countries where it is stored. The purpose for collecting, processing, or storing the data (for example, for ticket creation, summary generation, and so on) should be provided as a short description.
If your app shares information with any third-party entities, ensure to provide the name and domain of the entity, countries where the entity stores the data, and the purpose for sharing the information. Up to five external domain URLs can be declared.
Mention whether end-user information is encrypted both at rest and in transit, and specify if it can be accessed via app logs or exported.
Acknowledge and specify if the app adheres to Open Web Application Security Project (OWASP) security standards.
Mention whether the app transfers European Economic Area (EEA) residents’s End-User Data outside of the EEA and mention the transfer mechanism that governs those transfers.
Confirm whether the app permanently deletes end-user data automatically on app uninstallation. If the app data is not deleted, share details of the retention period, specifying a range from minimum to maximum days.
Confirm if your app allows customers to request for a custom data retention period.
App settings tab
This tab displays a table where the Keys column lists the keys present in the app_settings.json file of the app, and the Secrets column represents the values for those keys.
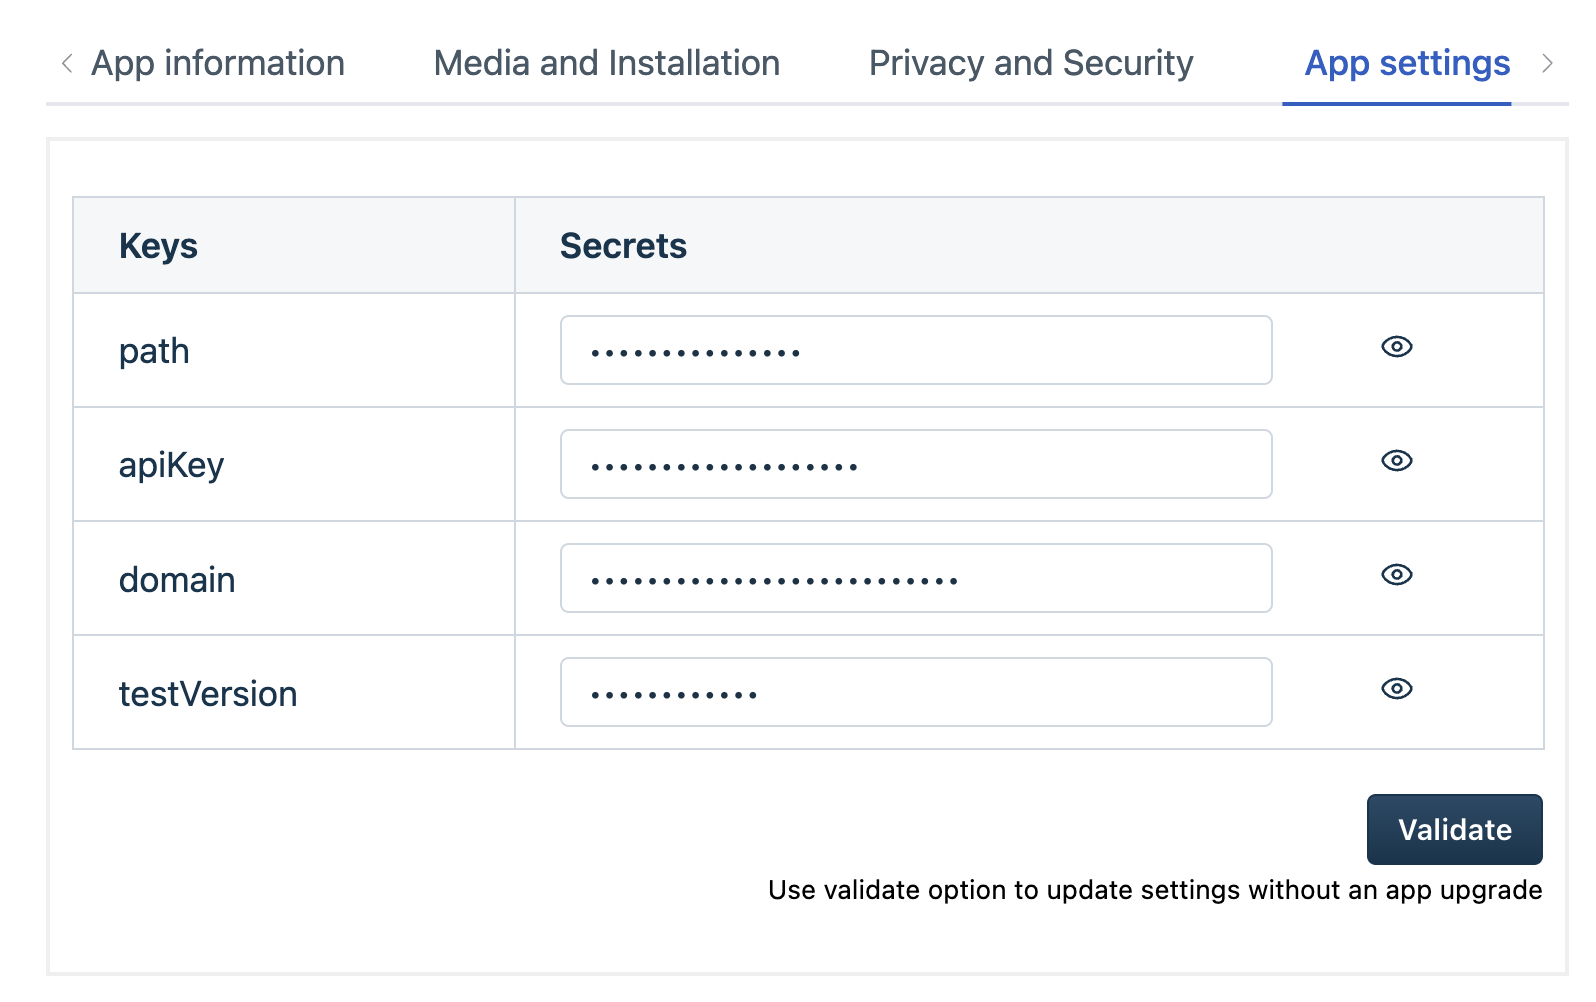 App settings tab
Configure values for the app settings based on the following cases:
New Freshworks app: Add values for the corresponding keys in the Secrets column, and click Save and Publish to submit the app for the approval process.
Existing Freshworks app: To update the app settings values of an existing Freshworks app that uses the app settings functionality,
Edit the existing values for the corresponding keys in the Secrets column.
Click Validate. The Validate button runs logic written in the onSettingsUpdate method of the app to validate the entered values.
Upon successful validation, a prompt is displayed to publish the app settings.
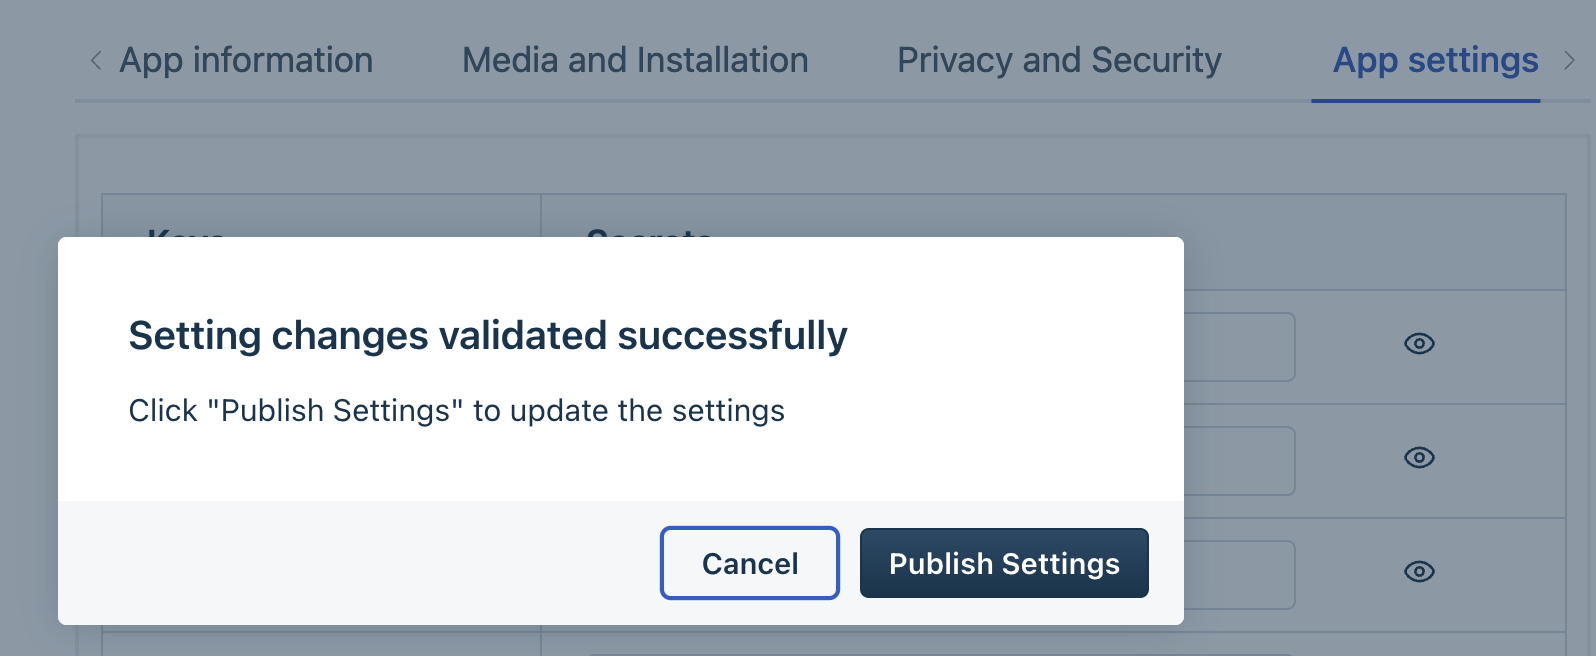 Publish App settings
Click Publish Settings to publish the app settings.